How to assemble gaming chairs from IKEA and test their performance

In today’s advanced era, gaming has evolved beyond just a hobby. It has become a promising activity. True gamers often spend hours battling alongside fellow players in the virtual world. 

Thanks to their ergonomic and modern design, many users, especially home gamers or remote workers, rely on IKEA gaming chairs for their comfort during long hours in front of a computer or device. 

However, the assembly process can be confusing without the right guide. This article is here to help, ensuring your gaming chair fully supports your passion with the correct assembly steps. 

Also read: Gamers’ dream room 

The advantages of a gaming chair for work activities 

The gaming trend is growing rapidly. This popular hobby is further supported by numerous competitions held both locally and internationally. The competitions make gaming a smart way to explore and develop skills in a field you truly enjoy.  

To become a top competitor, a gamer needs long hours of practice. Therefore, having a comfortable gaming chair and supportive furniture becomes a top priority.  

Beyond competing, many gamers also create streams or video content of their gaming sessions. To ensure their videos look good to viewers, the appearance of their gaming chair matters.  

Generally, gaming chairs are specially designed with features that set them apart from regular chairs, offering better comfort.  

As a result, gaming chairs are often used as office chairs or by those who work remotely. 

How to assemble an IKEA gaming chair: a step-by-step guide 

After selecting your gaming chair, it’s time to assemble it! IKEA provides a manual guidebook for assembling each component.  

The process does require attention and a bit of time. Every part of the gaming chair needs to be installed precisely.  

To make it easier, let’s walk through this additional guide! 

1. Prepare your workspace before assembling 

  • The first step is to prepare a wide, flat workspace.  

  • A spacious area makes it easier to organize all the components and minimizes the risk of losing small screws or installing parts incorrectly. 

2. Assemble the base of the chair first 

  • Start by putting together the base of the chair, which includes the wheels, legs, and gas lift. 

  • These components form the foundation of the chair, and the chair’s stability and height depend on how well they are assembled. 

  • The chair legs have several holes where bolts need to be inserted.  

  • Once the bolts are in, attach the wheels as support.  

  • Carefully insert the gas lift into the central hole.  

  • If you ever need to replace or repair it later, it’s best to seek help from an experienced professional. 

  • Ensure all wheels are firmly attached so the chair can move smoothly. 

3. Attach the seat and backrest 

  • After finishing the base, move on to installing the foam seat and backrest. These components are crucial for supporting your body while you work or play.  

  • Underneath the seat, you’ll find several bolts and screws that need to be tightened using a wrench. 

  • Then, connect the seat with IKEA’s signature lumbar support using additional bolts and screws. 

  • Make sure the seat and backrest are properly installed to maximize comfort during long hours of sitting. 

4. Assemble the armrests and accessories 

  • Next, install the armrests and headrest. These parts are designed to offer extra comfort, support your posture, and reduce tension during extended activities.  

  • Adjust the armrests and headrest positions to find the most comfortable setup.  

  • With these added features, your gaming chair will feel far more ergonomic and enjoyable to use. 

5. Test and make final adjustments 

  • Sit on the chair, adjust the seat height, and shift the backrest to your preference.  

  • Make sure every part feels stable and comfortable.  

  • This final step is crucial to ensure your chair is ready to support you during work or gaming sessions without any issues. 

Read also: A complete guide on how to assemble an office chair easily and correctly 

Tips for placing your gaming chair in your home workspace

Now that you have a comfortable and ergonomic gaming chair at home, how should you arrange it for a more aesthetic and functional space?  

Check out these simple tips you can apply at home! 

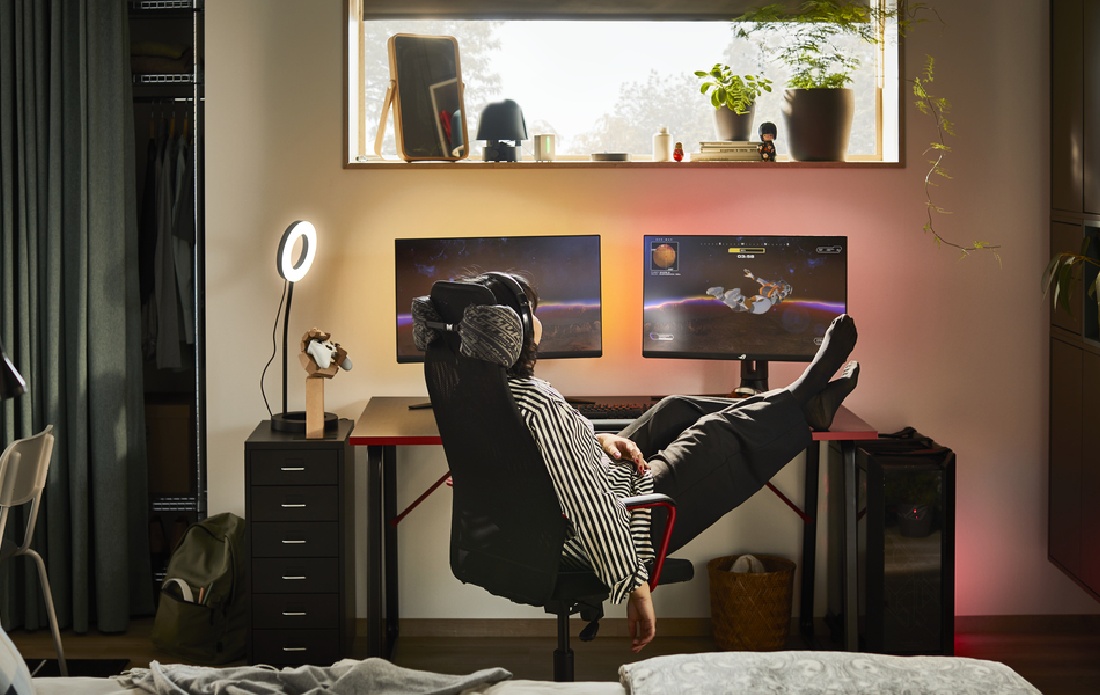
Place the chair according to the lighting and the desk position 

You’ve already invested in a quality gaming chair. To truly maximize comfort, make sure to position it near a natural light source, such as a window.  

Natural lighting not only livens up the room but also helps you stay focused while working or gaming.  

Set up your chair near your gaming desk with enough room to move freely around it.  

A well-lit and spacious environment will create a refreshing and productive atmosphere for your activities. 

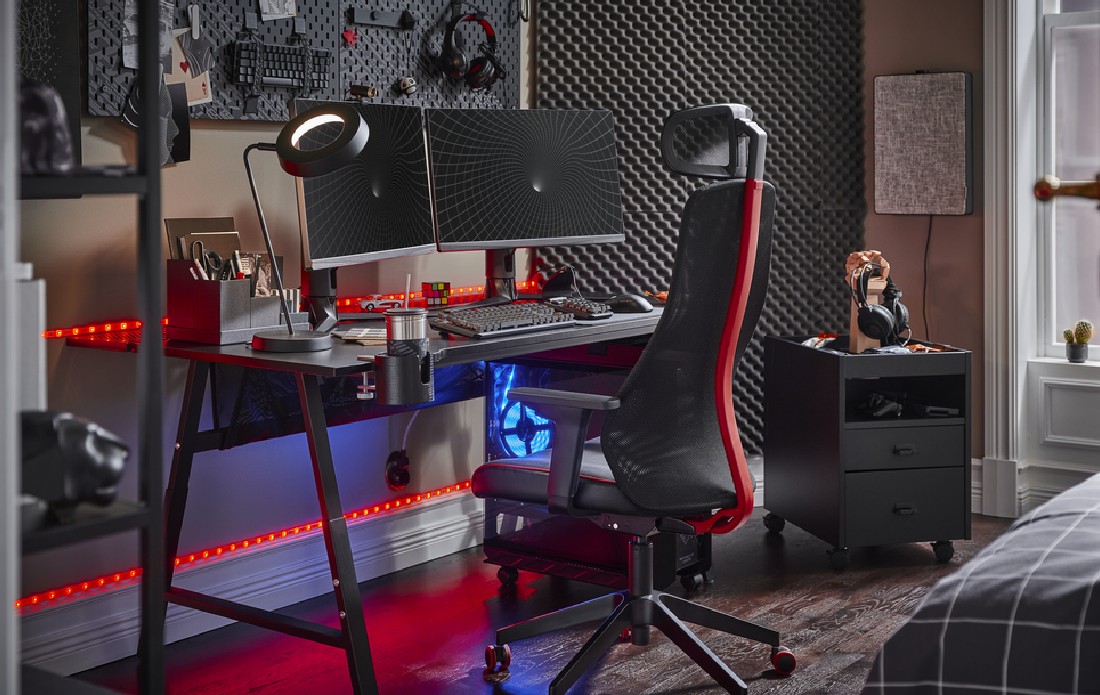
Adjust the distance between the chair and the desk for comfort 

Besides layout, pay attention to your workspace’s ergonomics. The chair’s height should align with the desk, especially where your hands usually operate the mouse and keyboard.  

The right distance will help maintain an ideal body posture and reduce the risk of fatigue, back pain, or even repetitive strain injuries (RSI).  

Through smart adjustments, you can enjoy long hours of work or play without discomfort. 

Combine aesthetics and functionality 

Comfort is important, but your gaming chair can also enhance your room’s decor. Choose a chair color and design that matches your interior concept for a harmonious and pleasant look.  

A chair with the right shape and color can strengthen the room’s character, creating an atmosphere that is not only cozy but also motivating for your daily productivity. 

Tips for maintaining your gaming chair for long-lasting use 

A gaming chair offers great comfort for long periods of sitting and helps prevent unwanted body aches.  

To keep your chair in top shape and your faithful companion for years, regular and optimal maintenance is key.  

Follow these simple steps to maintain your gaming chair’s durability! 

Clean the chair regularly 

Gaming chairs are typically made from high-quality materials such as genuine leather or high-grade synthetic leather.  

To keep your chair looking its best, cleanliness is crucial. For synthetic leather or mesh chairs, wipe them regularly with a damp cloth.  

Gently clean the surface to remove dust, dirt, or sweat residue. This simple routine effectively prevents unpleasant odors, preserves the material’s longevity, and avoids early wear and tear.  

By cleaning it regularly, your chair will continue to feel comfortable and look like new for much longer. 

Check the bolts and joints regularly 

Besides keeping it clean, maintaining the chair’s stability is also important. Over time, bolts and metal joints may loosen without you noticing.  

Therefore, conduct regular checks and tighten any loose parts. This small effort is essential to ensure the chair remains sturdy, safe to use, and resistant to wobbling or collapsing.  

A little extra attention can significantly extend your gaming chair’s lifespan. 

Ready to assemble your IKEA gaming chair at home?

Assembling your gaming chair at home can be a fun and rewarding experience. With IKEA’s value-for-money philosophy, you’re not only getting an ergonomically designed, high-quality product but also one that comes at an affordable price.  

It’s an ideal solution for gamers and productive workers who want to create a comfortable, functional, and stylish workspace or gaming setup.  

IKEA offers a wide range of gaming chairs featuring minimalist colors and designs that ensure durability and comfort. The signature gamer-style models will surely catch your eye!  

Visit the IKEA website to discover more affordable and high-quality gaming furniture!  

So, follow the steps to assemble your dream IKEA gaming chair and enjoy maximum comfort during your virtual adventures! 


Author:
Ayu Nindyakirana (Web & Digital Content Specialist)


Back to top